

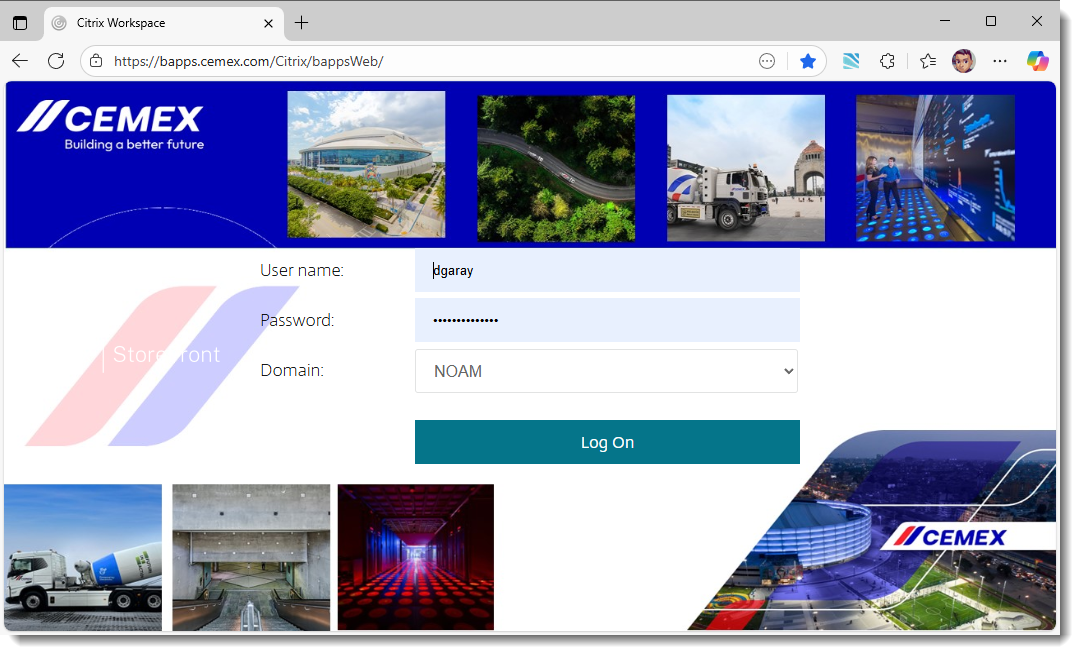
Step 1: Log in to Citrix
 If you encounter issues accessing Citrix, contact the Transport Support team at TransportOperationalSupport@cemex.com during EST business hours. After hours, contact GSC at 844-432-36396 or via Chat for immediate assistance.
Navigate to the Citrix Portal at https://bapps.cemex.com/Citrix/bappsWeb/ and sign in with your credentials.
If you have issues while trying to launch LoadMaster from Citrix, here are some solutions:
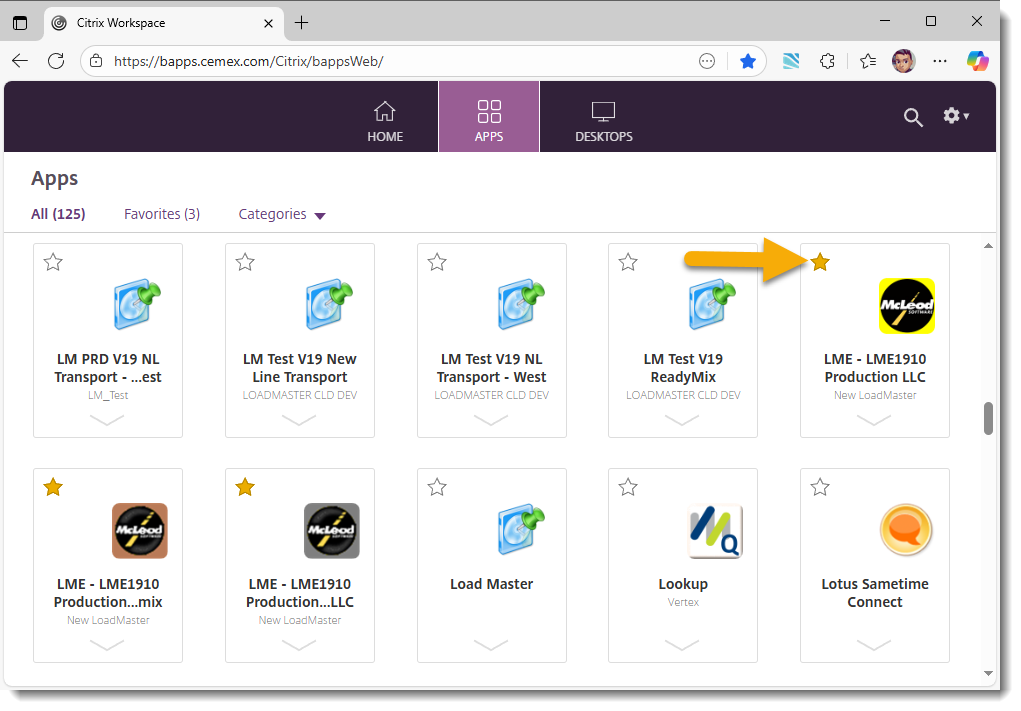
Step 2: Open LoadMaster
If you encounter issues accessing LoadMaster, contact the Transport Support team at TransportOperationalSupport@cemex.com during EST business hours. After hours, contact GSC at 844-432-36396 or via Chat for immediate assistance.
Once logged into Citrix:
- Go to All Apps.
- Make sure you see the LoadMaster icon.
- Click on the star to Add to Favorites so it appears under your favorite apps for quicker access.
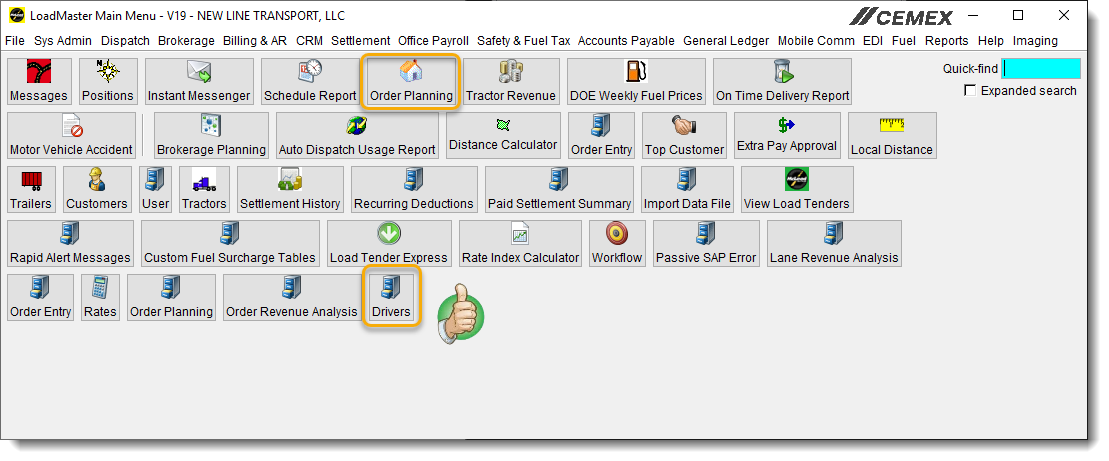
Create Your Own Menu
How do you create your own menu in LoadMaster?
- Go to Main Menu
- Search for the window you want to have on the main screen
- Drag it to the main screen
- Right click to name it differently or change the icon
After you finish setting up your menu, the screen should appear as shown below.
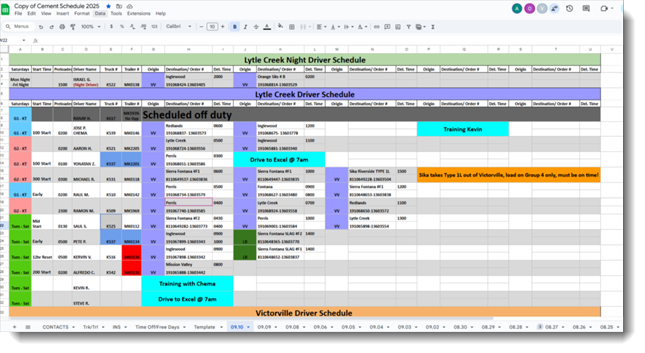
Dispatch Setup
- Select the correct date tab at the bottom of the screen to set up dispatch for the next day.
- In Column C (Preloaded), enter driver restart times.
- If the driver is preloaded, highlight the cell in teal blue.
- Once all drivers start times are entered, add their loads to build the schedule.
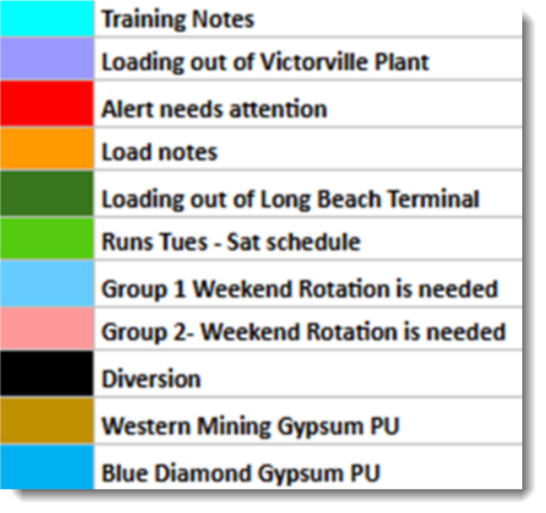
- Use the colors from the Key Coding Color Table to mark loads, notes, alerts, and other details appropriately.
We pull our loads from TMS, which are sent over from Logistics. Please make sure the date is entered under “Shipment Requested Date Time” in the format shown below:
09/10/25
To accept or return any loads we cannot take, follow the steps in the attached file labeled “TMS – Accepting Load Process.”
TMS – Accepting Loads
Need to learn how to request access or how to create a manual order in TMS?
1. Open Tomorrow’s Plan
- Select Transportation Smart Bench
- Open Default Search
- Select Tomorrow’s Plan
- Under Shipping Request Date Time → enter 07/30/25 (example)
- Under Load Carrier ID → enter US716902
- Press Enter
2. Move Loads to Worklist
- Highlight all loads by checking the box next to Origin Location Name
- Select Cascade
- Select Send to Worklist
3. Work from Shipment Legs Worklist
- Minimize Tomorrow’s Plan using the arrow
- Open Shipment Legs Worklist
4. Plan & Dispatch Loads
- Select the load(s) you are scheduling for dispatch
- To select multiple loads, hold Ctrl and click each load
- Click Remove to remove them from your list
5. Cancel Remaining Loads
- Highlight all loads left (that are not being taken)
- Select Cascade to Loads
- Highlight all loads again
- Go to Tender Operations
- Select Cancel Load Tender
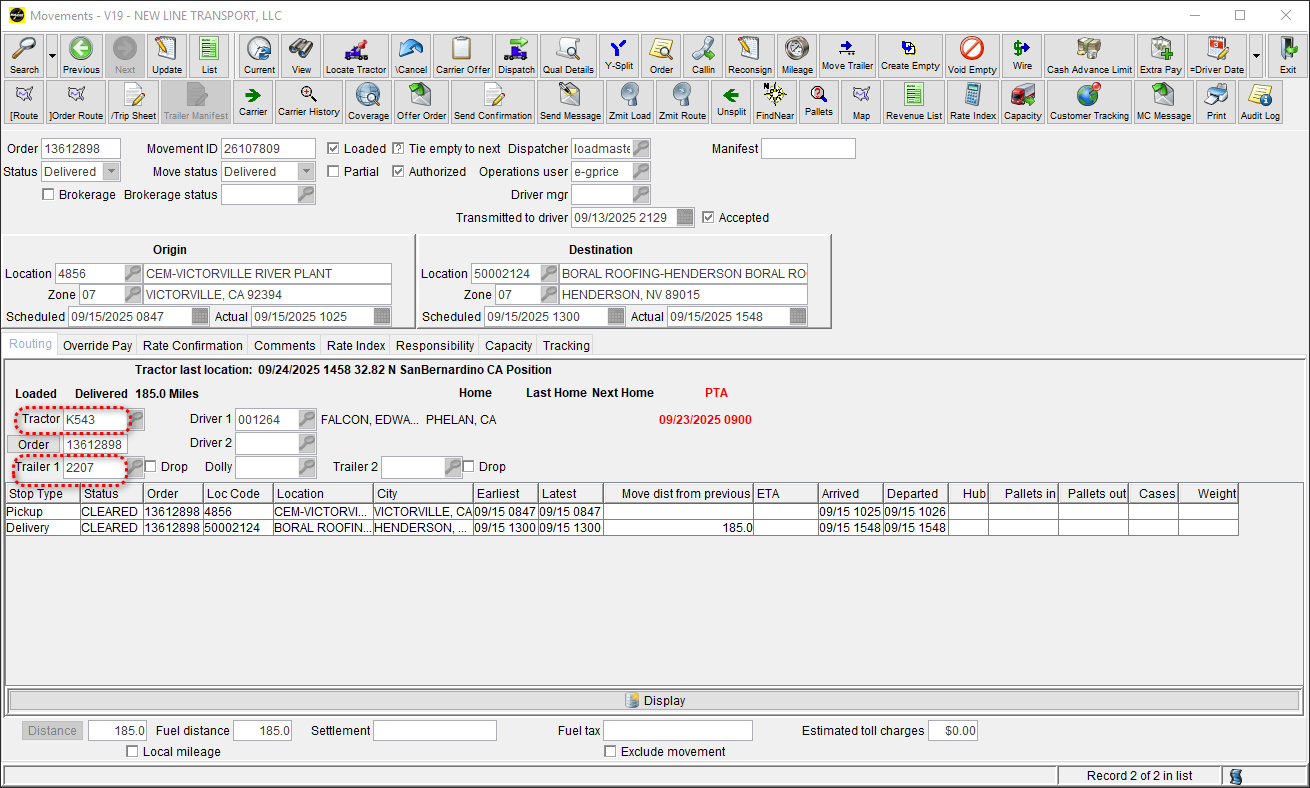
Z-mitting Loads in LoadMaster
- Select the load you want to assign
- Select the driver you are assigning the load to
- At the top of the screen, click Preassign
- The load will change color once preassigned
- After the load changes color, click Z-mit at the top of the screen
- Click OK to confirm
- Repeat until all loads are assigned
- Once complete, go down the list and verify that every load has been assigned to a driver
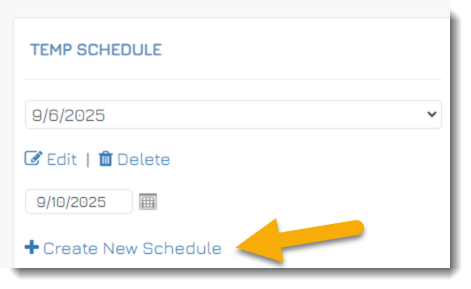
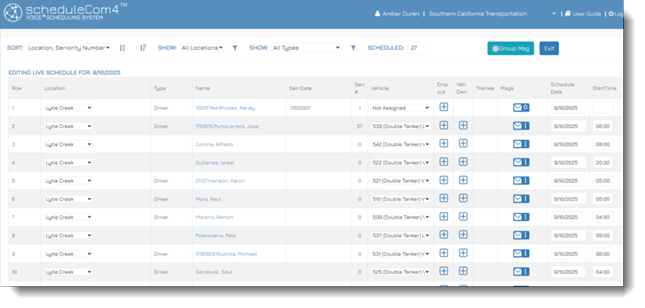
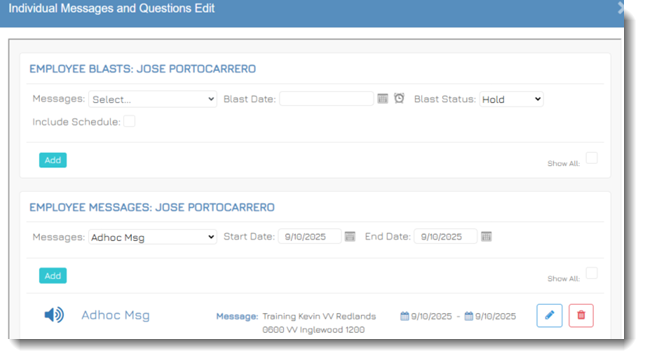
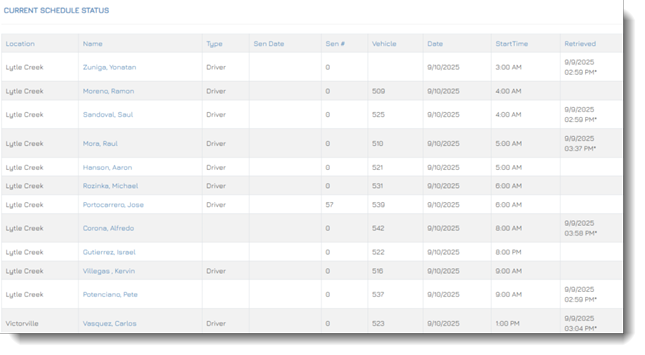
ScheduleComm


Motive App


The steps on How to Properly Send a Load to the Motive App can be found in the following link:
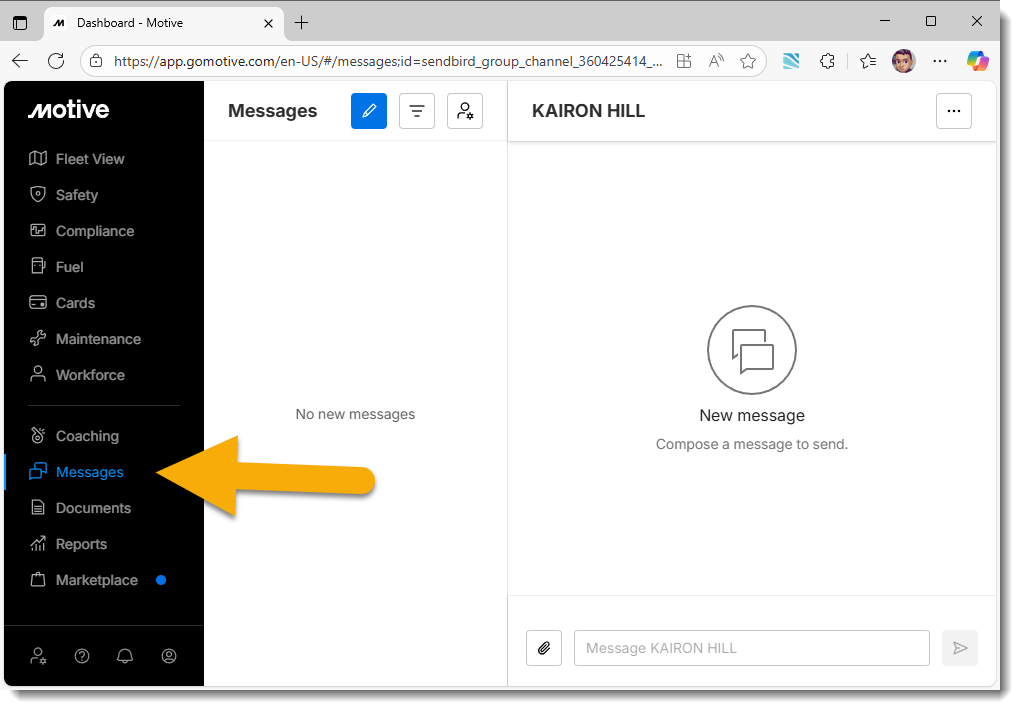
Motive App KB- Go to Messages
- Select the driver’s name
- Type and send your message
Billing Exceptions
You will be included in the weekly report sent by GSC. Review the report and correct exceptions as required:
- Verify the invoice number, customer, and amount
- Investigate and correct discrepancies
- Send confirmation back to GSC

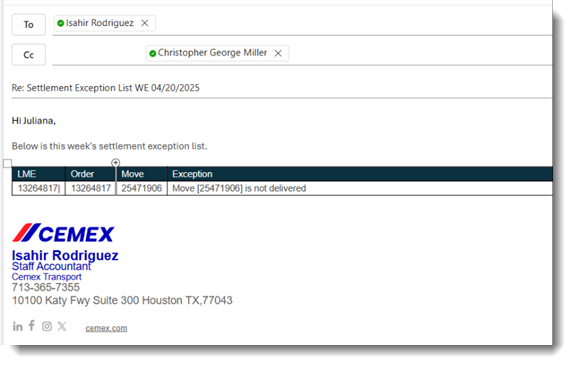
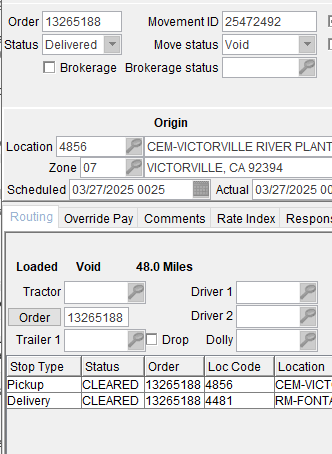
Settlement Exceptions
Review settlement exception reports weekly and take corrective action as needed:
- Identify loads with settlement discrepancies
- Correct the issue in LoadMaster
- Confirm correction with the reporting team